
PSSSST...I'm no longer blogging here!
You can now find me at
------------------------------------------------------------------
Well, y'all know I have a thing about fireplaces and mantels, yeah?
Here's the before....

I'd been itching to work on the new house's fireplace/mantel since moving in.
I had some wishy-washy ideas that began to solidify when a dear friend gave me this piece of scrap pallet wood...

At which point I started obsessing about paint colors.
When we were deciding on finishes, it was cost-prohibitive to carry the stone all the way up to the peak....so I always intended to do some sort of 'treatment' to blend the drywalled part with the stone.

I started by finding a swatch of colors from Sherwin Williams that blended well with the colors on my stone...which happen to have both pink and yellow undertones....which I happened to learn thru this process don't really play nicely with eachother. It took me no less than 10 samples to get the right shade....
This shows one of the first oopsies at the top.
I won't show you the 8 other shades of 'bandaid' I tried.....

The one that made the room sing ended up being Interactive Cream.
BAM.

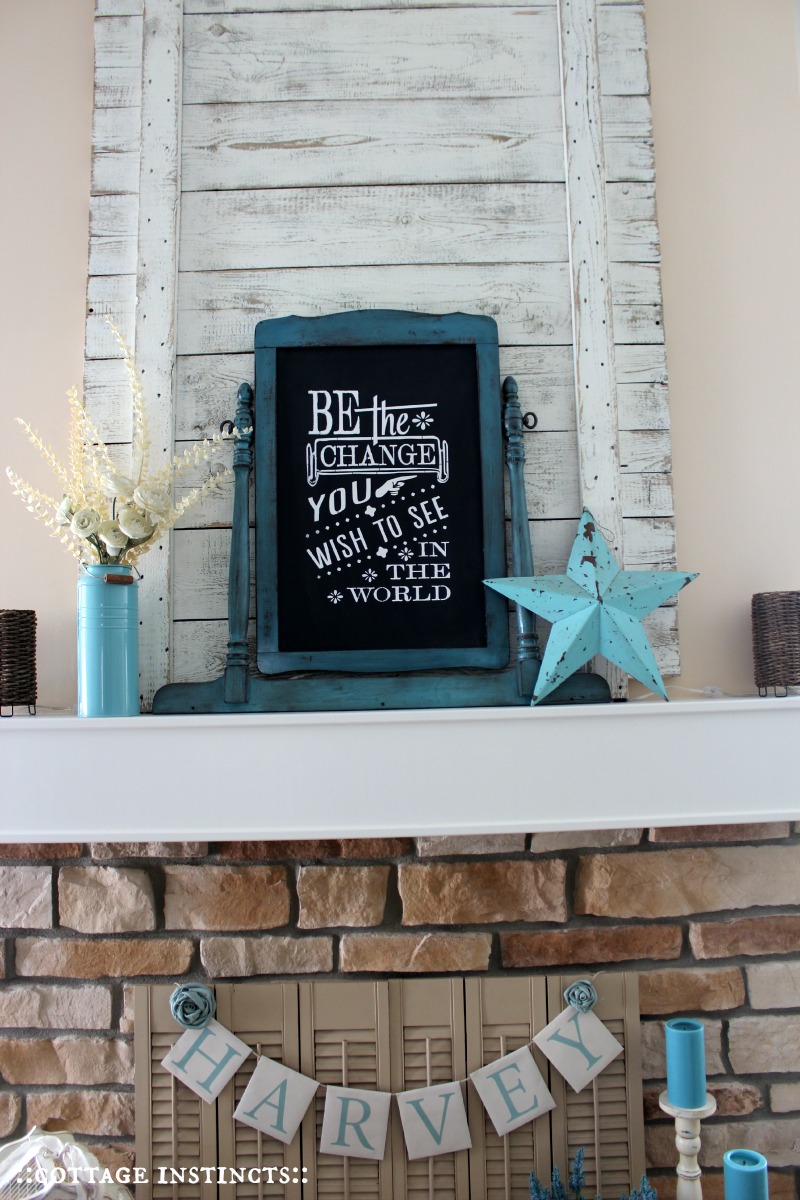
I painted the pallet piece with left over wall paint (Glidden's Antique White), and heavily distressed it with my palm sander. Hubs used 4 ginormous screws to attach it to the wall.


Sewed up some wispy panels with poor-man's linen....osnaburg muslin.
20 yards at $3/yd using my 50% off coupon at JoAnns.

They're not hemmed yet, and I think I'm gonna do some bishop sleeves.
Instead of fiddling with a DIY corner rod, I just used those good old fashioned metal rods that cost like $3 each. No finials or anything. Lowe's had 'em in oil rubbed bronze.
Score.

See how nicely they meet in the corner?
Total cost for dressing my three super large windows...$75.
They really helped pull the room together, bringing the fireplace to the center.

I had originally thought I'd plank the drywall above the stone, but when serendipity strikes, you grab it!
The cast-off pallet wood works perfectly.

Love the rustic texture....as I was sanding, it brought out the yellow undertones in the white paint....hard to see, but trust me, it looks awesome.

My great room is finally coming together....it's not a large room, but with the massive windows and vaulted ceiling, everything felt a bit lost. Adding some color and texture has helped it feel warm and welcoming.

I'll share some other things I did in the room next post. Of course it's not done yet (as if it ever gets 'done'). I hope to add planking and beams to the ceiling eventually, and I'm considering painting the white walls a neutral called 'Biscuit', which happens to be the lightest shade on that strip from Sherwin Williams. I'm hording lighting ideas, including some sconces or lanterns for either side of the rustic wood board. The small rattan uplights from Target up there currently look awesome turned on at night, but look dinky during the day. And I have some more sewing to do to tie in the green chairs to the scheme.
Happy for now :)

I'm almost done with the master re-do as well. I'll be showing off the new paint color, sewing projects, headboard building, and decor soon!
So what do ya think? Improvement?
Think I'm nutso for putting a huge piece of scrap wood on my mantel?

Hauling my Fireplace/Mantel here:
Junkers United, Under $100 Linky, Makeover Madness Link Party, Shabbilicious Friday, Feathered Nest Friday, Be Inspired, Best Linky Party, Fab Creative Friday Linky, Before and After Wednesday, Catch as Catch Can, The Inspiration Gallery, Junkin' Joe, That DIY Party, Mod Mix, Monday, Inspire Me Monday, Inspire Me Tuesday, The Scoop, Knick of Time Tuesday, Nifty Thrifty Tuesday, What We Accomplished Wednesday, Be Inspired Linky, Twirl and Take a Bow, Blissful Whites Wednesday
Junkers United, Under $100 Linky, Makeover Madness Link Party, Shabbilicious Friday, Feathered Nest Friday, Be Inspired, Best Linky Party, Fab Creative Friday Linky, Before and After Wednesday, Catch as Catch Can, The Inspiration Gallery, Junkin' Joe, That DIY Party, Mod Mix, Monday, Inspire Me Monday, Inspire Me Tuesday, The Scoop, Knick of Time Tuesday, Nifty Thrifty Tuesday, What We Accomplished Wednesday, Be Inspired Linky, Twirl and Take a Bow, Blissful Whites Wednesday
